.jpg)
Halloween Themed Cards
What You Need (some materials are optional):
*Blank card stock or thick paper folded in half
*Watercolor paint (I used shimmer watercolors)
*Paint brush (medium sized)
*Newspaper and wax paper
*Paper weight or heavy book
*Stamps and ink
*Computer paper and printer
*Decorative paper
*Glue and scissors
*Markers, glitter, paint, decorations, etc.!
1) Get your blank card stock. You can do one at a time or if you're making a bunch, you can do a couple of similar cards at once to make it easier. Open your card/s flat and lay it on newspaper or some area where you can work.
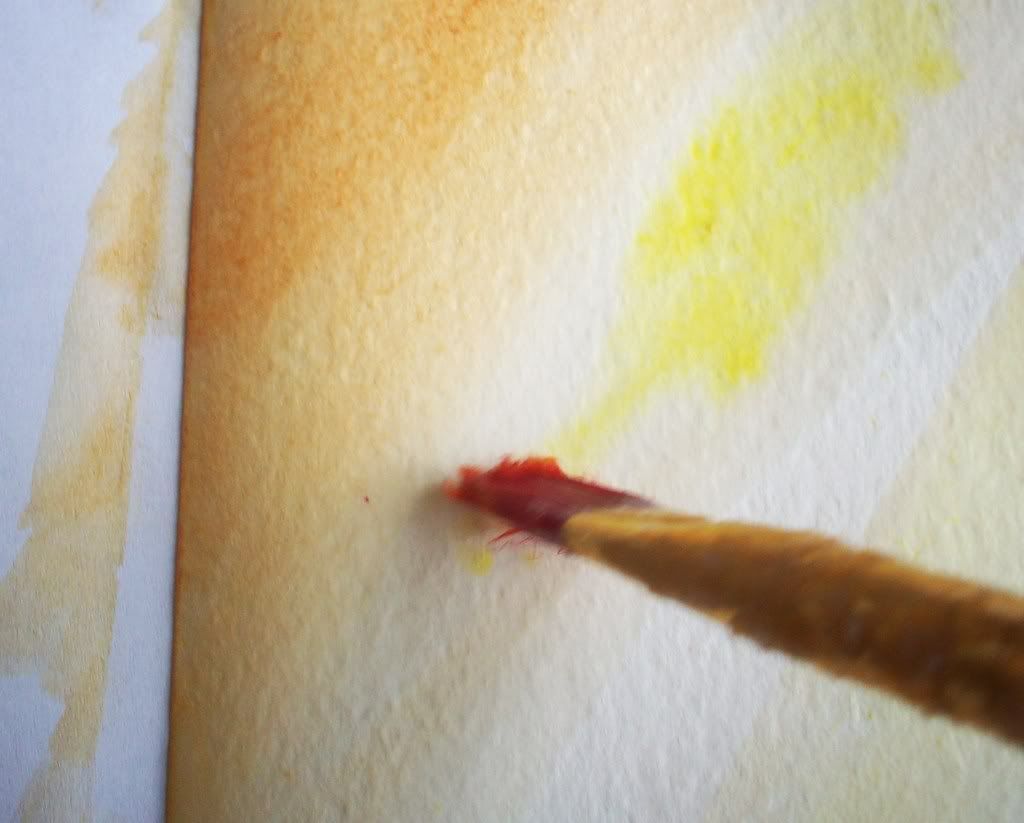
2) Use watercolor on the background. I like to choose two different colors that are similar or go well together. On the Halloween cards, I used yellow and orange shimmer watercolor. Make diagonal strokes of watercolor with your paint brush. I started with a darker color on the bottom right corner and just worked my way across with the strokes, alternating between the two colors. The colors will make a nice blend if they overlap each other and you'll get different shades of color. If you're not using shimmer watercolor, you can add a little glitter or embossing powder while the paint is still wet to give it some sparkle.
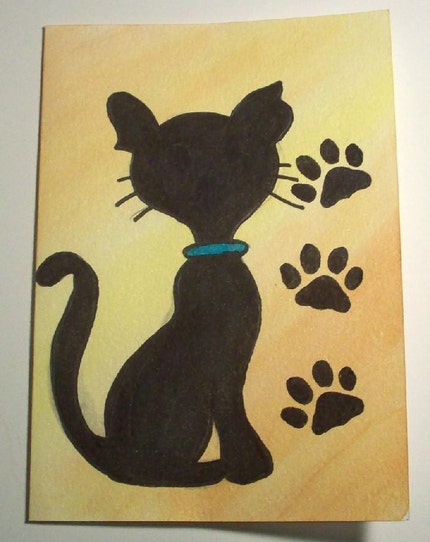
3) Let the background dry (the good thing about watercolor is it dries really fast). Now comes the fun part of decorating. You can be really creative and original here. I started off drawing the design in pencil first. If you're not sure what to draw or how to draw something, google some images. In my example, I did a cat so I used the google image search to find a photo of cartoon cat just to make sure I drew everything accurately.

4) Color in or paint the image you drew. If you're using paint, I like to do lighter colors first because I think it makes it easier. I used watercolor paint on the colored parts of the cat - the collar and eyes. I then used a journaling pen (you can use a thin sharpie marker) to outline my details.
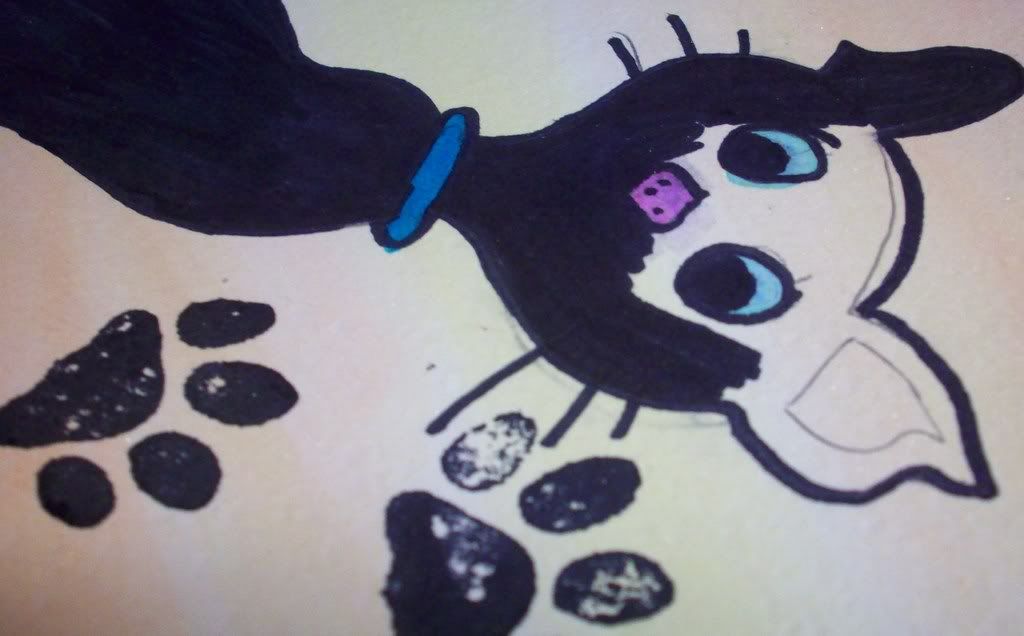
5) I traced over my image in black sharpie marker and then colored it in black, making sure to outline the watercolor details first. You don't have to stick to watercolor and marker. Use any materials you have available – colored pencils, paint of any type, markers, glitter, scraps of decorative paper, etc.
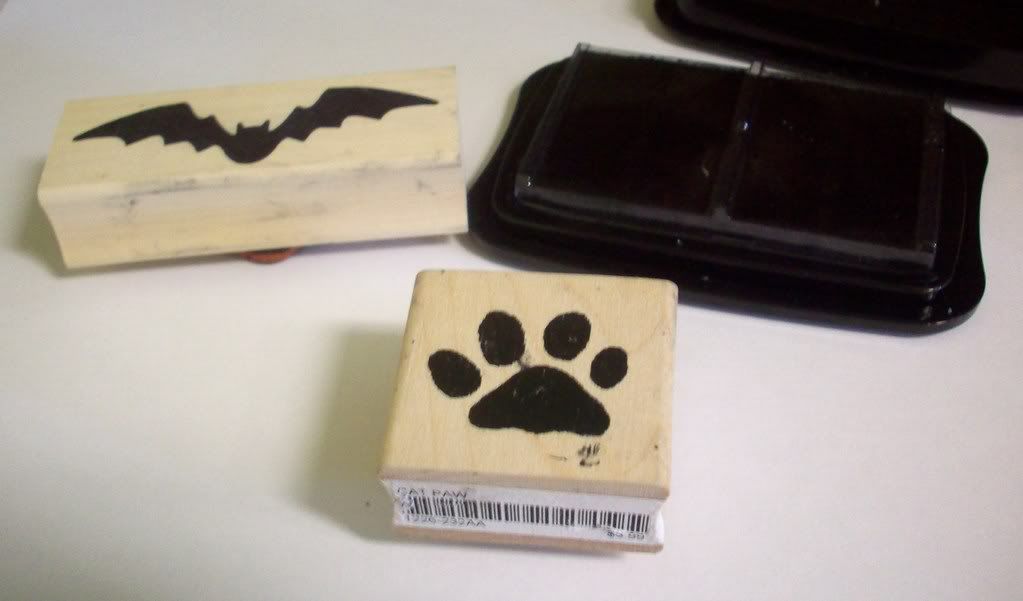
6) I wanted a little something extra, so I also used stamps on my cards. You can use any stamps you have. For my Halloween card with a witch hat, I used bat stamps to match the theme. For this card, I used pawprint stamps to go with the cat.
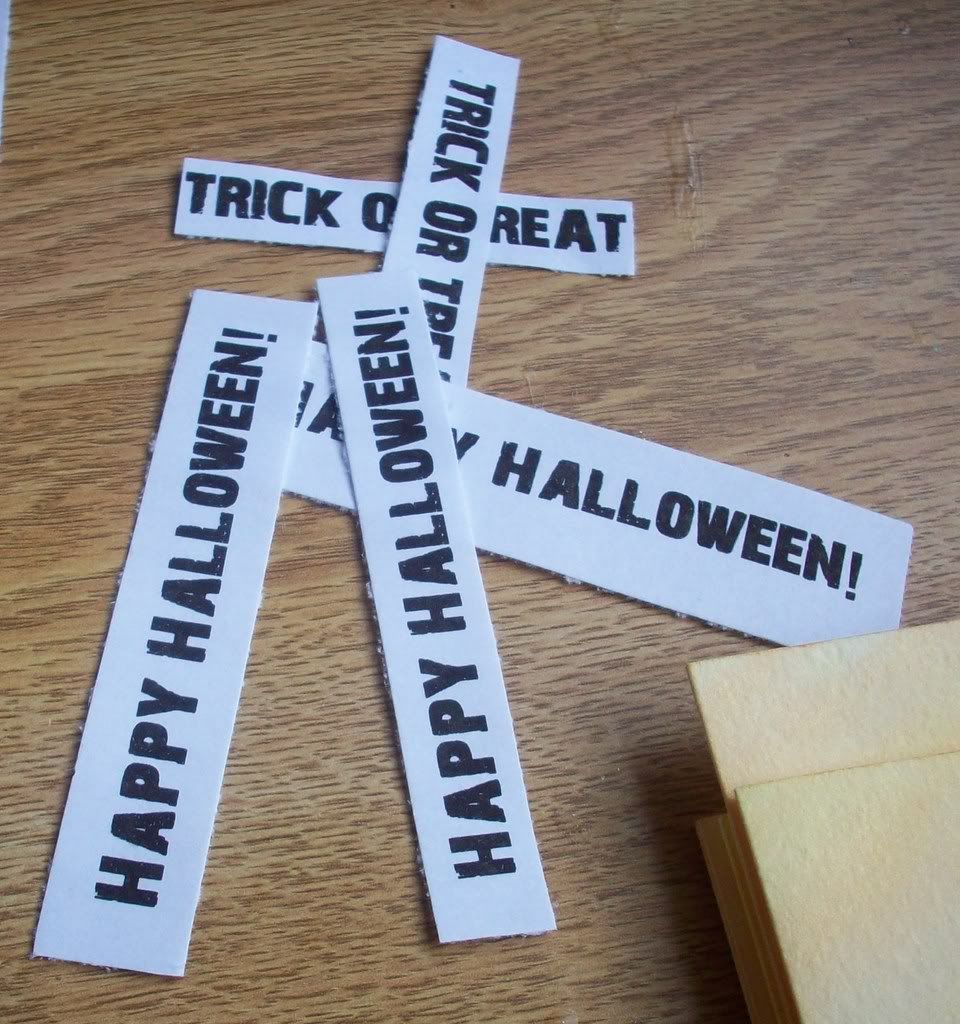
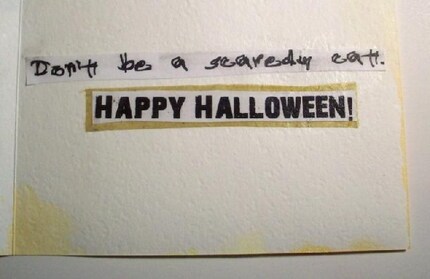
7) As I let the card dry, I work on the inside of the card. Usually you want just a nice, simple message and room to write a personal message. You can be as clever or witty as you like. For my Halloween cards, I googled popular Halloween sayings to get some ideas. In this card, I wrote "Don't be a scaredy cat." in a sort of Halloween looking font called Administrator Password. I also wrote “Happy Halloween!” in 28 Days Later font, bold. Print those sayings out and cut them out with scissors or a cutting board. You don't have to stick to a square, you can cut them out in fun shapes such as zig zag borders or waves.
8) I usually like to add a little decorative paper on the background of my sayings so it looks nicer. Find a decorative paper you think goes well with your card (or use colored construction paper) and cut out so it's slightly bigger than your saying. Glue to saying to your decorative paper. You can put the saying on the inside to make it a surprise when the person opens the card or put it on the outside if you think it looks better there (or both).
9) Now you just have to let your card dry. I find that my cards get bent out of shape a little when I watercolor, so you can wrap them in wax paper and put them under a heavy weight or book. Let them sit for a couple hours or overnight.
10) You're almost done. All you need now is to find an envelope that's the right size of the card. Usually when you buy card stock, they have the right size envelope to go along with it. For my card, I needed an A7 sized envelope. If you don't have an envelope or want to be more creative, you can make your own out of decorative or construction paper (if you used any decorative paper on your card, you can use that same decorative paper on the envelope to coordinate). Envelopes are pretty easy to make. If you open apart an envelope you're not using, you can use that as a pattern and copy the folds. That's it! :) You have your card and envelope.
Here's my result. This one is sort of dedicated to my black cat, Luna. :) I also ended up not keeping the face details because they ended up looking weird with the black background of the cat (a lot of card making is experimenting), so it's a silhoutte of a cat now.
Pet Lovers Black Cat Halloween Greeting Card
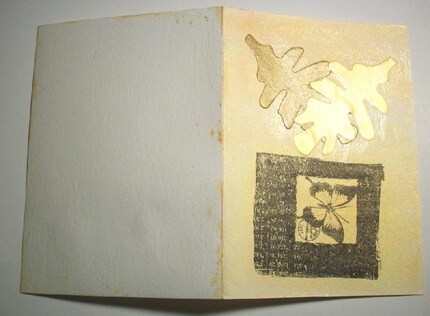
I also made this autumn leaves card to celebrate the start of autumn (this Monday), which uses a similar technique.
I'm going to be listing two more cards like this soon (one's a witch hat design and the other has some bats). If you don't make your own, you can always buy mine (now's a great time to buy because of my 20% off sale!(. ;)
5 comments:
awesome tutorial, i am going to bookmark it and show it to my partner, she needs some more artsy projects!
Great job on the tutorial. The pictures are great and show what you are explaining even better.
very nice presentation! hey, you can list tutorials like this (with photos + text) at INSTRUCTABLES.com! That's what I did with some of my step-by-steps.
Super cute! :)
What a super neat tutorial!
Post a Comment